
Making your own stock from scratch really is as simple as bringing a pot of water to a boil. In fact, I hear it can be done just as well in a slow-cooker, so I guess it’s even easier than that. It’s also cheap – I mean, dirt cheap – because you can basically use up whatever scraps you have lying around. Once you make your own, you’ll start to wonder why you ever bothered paying four-bucks a carton at the grocery store.
The other benefit of making stock at home is you get to decide what goes into it. Have you ever read the ingredient list of most store-bought stocks? Besides the basics they also have seasonings added to them, along with a healthy dose of “caramel color”, whatever that is.
Traditionally, stocks are made without salt or other seasoning (although those things are optional, and can be added if you like), because they are meant to be a blank canvas for creating a dish. This is why most recipes specify low-sodium stock – not because it’s healthier, but because you can season the dish to taste. Once the stock is seasoned, it becomes a broth.
So, let’s recap: easy, inexpensive, made to taste… oh, and did I mention you can freeze it? Homemade chicken stock will last for months in the freezer, meaning you can make a big batch now and not worry about when you might need some.
In case I still haven’t convinced you, I’ve put together a little tutorial to elaborately demonstrate how easy making your own stock can be.
It’s FAK Friday (Feeding my Appetite for Knowledge) and today I’m making chicken stock! It’s just like the stuff you find in the store, only cheaper, better, and full of awesome. You can make this stock with chicken or turkey. I like to make it whenever I’ve roasted a whole bird (Thanksgiving, anyone?), but you can just as easily save up bones and other scraps in a zip-top bag in the freezer until you have enough.
1. The first step to making chicken stock is to get yourself a chicken – or, more accurately, a bunch of chicken bones. I like to make stock whenever I roast a whole bird, this way I get to use the bones, any scrap meat/skin/etc., and whatever giblets may have come with it. Since I just made this awesome chicken salad & oven roast chicken, that’s what I’m using here. Otherwise, you can save up scrap bones and bits in a zip-top baggie in the freezer until you have enough to work with. (I’d say at least a gallon-sized bag full.) You could also use the leftovers of a store-bought rotisserie chicken, if that’s easier for you.
Place all the bones, and any bits of meat, fat, skin, or otherwise unsavory bits, into a large stock pot.
2. Next, you’ll want to add a bunch of aromatics. How about some carrots, onion, celery, garlic, parsnips, mushrooms… whatever you have lying around. The best part of making stock is you don’t have to use the the good bits – use the leafy part of the celery, the root ends of the carrots, the stems of mushrooms, and the peeled-away outer layers of onion. Crush the garlic with the back of your knife, but don’t bother peeling or chopping it – the whole thing can go straight into the pot. If you’re prepping your Thanksgiving dinner, start throwing things in here instead of the compost. (Okay, maybe not everything, but you get the idea.)
3. Got any fresh herbs that need to be used up? Toss ’em into the pot! I frequently have a bunch of parsley, or fresh thyme sitting in the fridge that needs to get used up before it spoils. Use a few sprigs of whatever you have to give the stock a little more flavor. You could also add whole dried herbs like cloves, whole peppercorns, or star anise, but keep in mind that these flavors can always be added later on. (see note.)
Note: you’re welcome to add a bit of salt or other seasoning if you’d like, but keep in mind that a stock is meant as a blank canvas for creating other dishes. Seasonings can always be added later on, but they can’t be taken out!
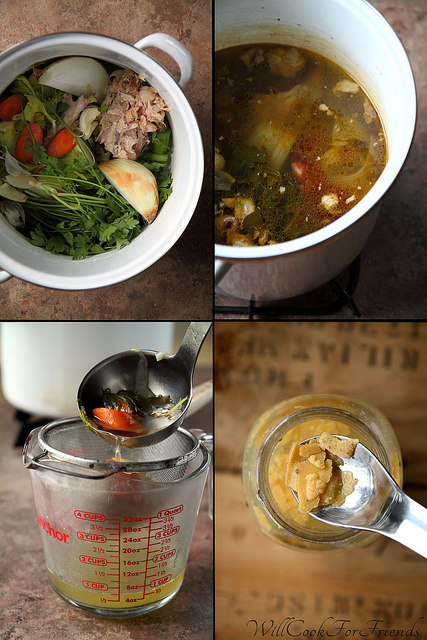
4. Fill the pot with water – enough to cover everything thoroughly – and bring it to a boil. Feel free to put a lid on it to make it boil faster. Once you’ve got it going, reduce the heat to a simmer, and let it go (uncovered) for as long as you like. You can make a stock in as little as a couple hours, but the longer you simmer it the more flavor you’ll extract. I’d say a good 4-6 hours on the stove (or 6-8 hours in the crockpot?) will make a pretty fantastic stock. Just be sure to add a bit more water as needed to keep it from evaporating too much.
5. Now that your stock has simmered for a good long time, go ahead and strain out all the solids. I like to set a mesh strainer over a big bowl or pot, and carefully pour (or ladle) the stock through. Go ahead and dump the contents of the strainer into the trash – it’s done it’s duty.
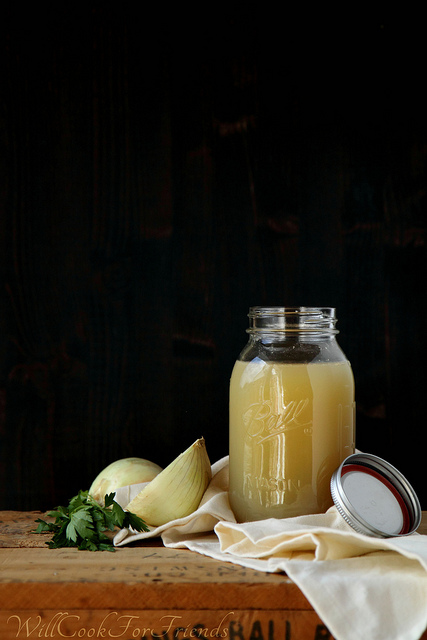
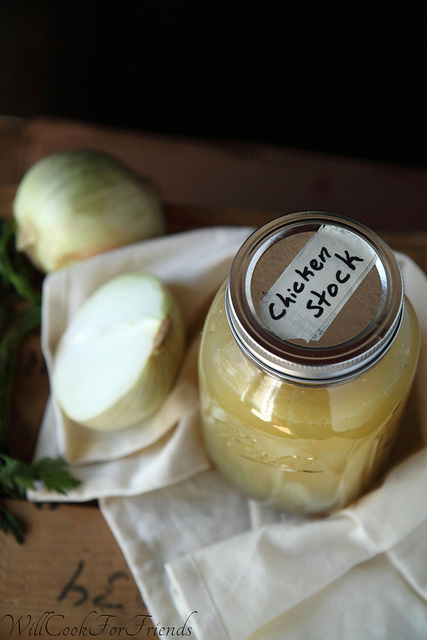
6. From here you can pour the stock into jars or other seal-able containers. I usually get about twelve-ish cups of stock from one batch, but that amount will vary depending on how much water you use and how long you simmer it. Less stock means more concentrated flavor, so don’t worry, it’s not a bad thing! Place your jars or containers into the fridge (after they’ve cooled a bit, you don’t want to warm up the fridge too much) and let them chill for a few hours or overnight. Once their nice a cold, any fat in the stock will float to the top and become solid. You can leave the stock as is (richer stock = more flavor), or you can skim some or all of the fat off the top and discard it.
7. Now the stock is ready to use, or be stored for later! Homemade chicken stock will last for up to a few weeks in the fridge, or can be frozen for up to several months. I wouldn’t be surprised if it could last a whole year, even. To freeze, divide the stock into manageable portions (two cups, four cups, or freeze the stock in TBSP size portions in an ice-cube tray to use when a recipe calls for just a little). Be sure to leave plenty of head room in your containers, especially if you’re using glass jars, to allow space for the liquid to expand as it freezes. Nobody likes broken glass in their soup.
8. That’s it! There is no eight, I just like putting numbers in front of things. You can now take a moment to pat yourself on the back for a job well done, because homemade stock is just the beginning to so many more homemade meals. Use your chicken stock whenever a recipe calls for some, or use it to make your own homemade soups, stews, and sauces.
Enjoy!


I couldn’t agree more. I use chicken stock at least a couple of times a week but haven’t bought the supermarket container in years. Better quality and cheaper too.
That’s awesome! I try to use homemade stock whenever possible, but I don’t always remember to make it… I still keep a container of store-bought in the pantry just in case. One of these days I’ll get more organized about it and have a constant rotation of homemade stock on hand!
Thank you for this great idea, I will start using it as when winter comes I use a lot of chicken stock for soups.
That’s a great idea! I definitely go through a lot of stock in the winter.
So, will the tutorial on how to boil water be coming soon? I mean I get the part about putting water in the pot, and I can handle putting the lid on, but I’m unclear about how to get the water heated up.
Ha! You’re right, what was I thinking… I’ll start putting together more detailed tutorial right away. ;)
I love making homemade veggie stock at home, so easy and cheap!
Isn’t it just? The only stock I’ve made at home that was more expensive than store-bought was mushroom stock, and that’s because I used a bunch of fancy dried mushrooms as well as fresh. Best mushroom stock ever, though! :)
Thanks for sharing! :)
x
You’re welcome! :D
I totally make my own chicken stock. or rather, i do it in the fall and winter mostly, because that’s when i tend to roast chickens. In the summer my house gets terrifyingly hot if i leave the oven on for an hour at 400 degrees, so…i don’t roast much right now. But you’re right; it stores forever, and great tip about the manageable freezing portions! I sometimes go through my commonly used recipes to see what quantity of chicken stock they need (most risottos = 4 cups, etc) and freeze it like that. your FAK series is SO much fun.
Thanks, Shannon! I do that, too – look at upcoming recipes to decide what I’ll need. And my house gets crazy hot in the summer as well… The Fiance actually bans me from cooking anything at all on the worst days (the horror!). I like roasting one or two chickens in the spring, if I can, before it’s too hot so I have stock on hand for the rest of the year. And if worse comes to worse, there’s always rotisserie chickens. :)
This is so interesting! I have made stock for immediate use before but not to refrigerate or freeze for later use. I should definitely start doing that, since homemade stock is so much tastier than the store-bought stuff. This is the perfect tutorial for it :)
Thanks! I used to try to just make-it-and-use-it too, but usually I was too lazy to make the stock right when I needed it. Storing it makes life much easier!
Nice post Willow- a great reference to keep. Pinned to my
“things to know” board. Happy blogging! Gail