I’ve never really been the type for roses. Pretty red bouquets that only last a few days, then wilt and fade, crying petals onto the table before being unceremoniously dumped atop the compost pile.
Instead, I prefer my sweet things in the form of desserts. Nothing says, “I love you” like homemade ice cream, or gooey cinnamon buns. Or, in this case, sweet pastry crust and apples drowned in caramel. The resemblance to roses is only an added bonus — equally pretty and sweet smelling as the real thing — before they get devoured. This is my kind of flower arrangement.
In my last post I shared a recipe for homemade Cajeta — a Mexican caramel sauce made from goats milk and brown sugar — which has been tempting me from the fridge ever since. These individual tarts served two purposes: use the cajeta in a more creative way than spooning it straight from the jar to my mouth, and also, land here on the blog just in time for Valentine’s day. Romantics, take note: apples and caramel were made for one another, and I see no better way to celebrate their marriage than in the form of these tarts, with someone you love.
They may be impressive to look at, but in reality, these tarts are deceptively easy to prepare. The crust is a pate sucree — sweet pastry dough more like shortbread than pie crust, and far more forgiving. There is no cutting of butter into flour, or fearfully adding water drop by drop in search of the right consistency. The dough comes together without a fuss, and the only real room for error is in not giving it enough time to rest in the fridge before baking. This recipe makes enough for four or five mini tarts, but you could just as easily make two and freeze the remaining dough for later. It’s pretty great that way.
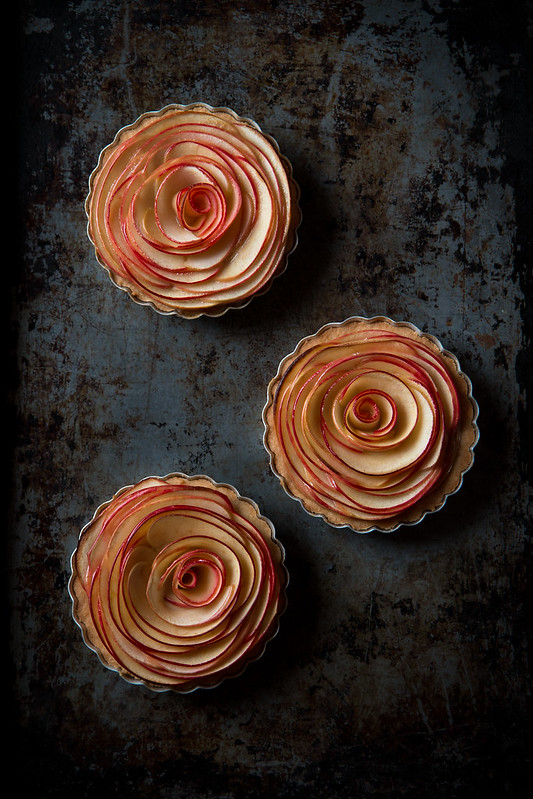
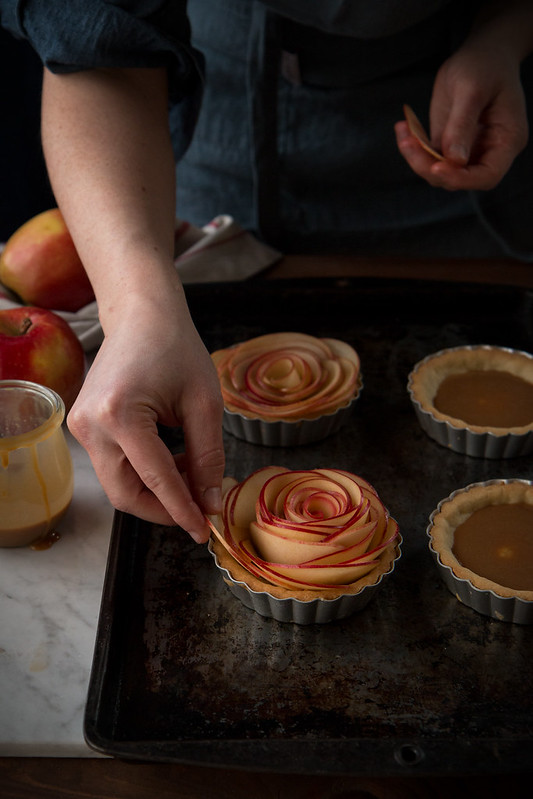
The apples are sliced paper thin on a mandolin (if you can do so by hand, I envy your knife skills), then tossed with sugar and lemon juice to keep them from browning. The roses are made by rolling one slice of apple tightly , then spiraling another and another and another around it, until you have reached the edges of the tart. I found it easiest to start the bud of the rose in my hand, until it became too big to hold, before setting it down in the center of the tart shell, in a small pool of cajeta, and adding the outer petals. There is very little art to this, and it doesn’t have to be perfect to be beautiful. Once the tart shell is full, gently fan the slices out to create a more open, in-full-bloom kind of look.
This definitely requires a little more time and attention than just throwing a handful of apple chunks into the tart shell, but in my opinion, the payoff is well worth the extra effort.

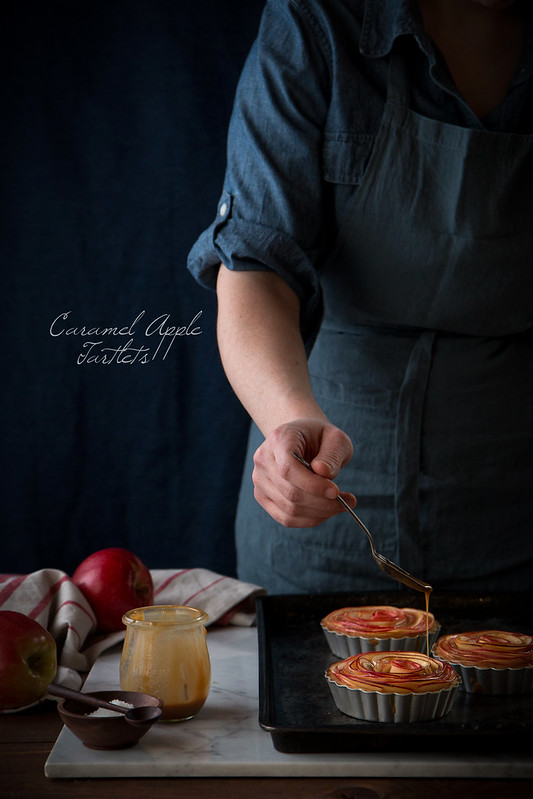
Oh, and a little extra drizzle of cajeta over the top never hurts.
- Tart dough:
- ½ cup (1 stick) unsalted butter, room temperature
- ¼ cup granulated sugar
- 1 large egg, room temperature
- ½ tsp. vanilla extract
- ¼ tsp. almond extract (or orange oil, or other flavoring)
- 1½ cups all purpose flour, plus more for rolling
- pinch of salt
- Apples:
- 3-4 small red apples (I used gala, but use whatever variety you enjoy)
- 3 TBSP granulated sugar
- 2 TBSP fresh lemon juice
- 1 tsp. cinnamon (optional)
- ¾ cup cajeta (recipe here: https://www.willcookforfriends.com/2015/02/homemade-cajeta-goats-milk-caramel.html -- I added a splash of rum and some extra cinnamon to the cajeta I used in these tarts)
- In a large bowl, or the bowl of a stand mixer, cream together the butter and sugar. Add the egg, vanilla, and almond extract, and mix to combine.
- In a separate bowl, whisk together the flour and salt. Add the dry ingredients to the wet ingredients, and mix until just barely combined.
- Shape the mixture into a ball, and place on a sheet of plastic wrap. Pat the ball into a disc, wrap tightly, and refrigerate for a minimum of 30 minutes, or up to a few days.
- When ready to use, remove the dough from the fridge. If it's been chilling for a long time, it may need to rest for a few minutes to soften slightly. Dust your work surface lightly with flour, and roll the dough to between ⅛-1/4 inch thick. Using a mini tart pan as a guide, cut circles from the dough that are about one inch bigger in diameter than the pan. Press the dough into the pans, being careful not stretch or pull. Run the rolling pin over the top of the tart pans to trim away any excess dough. (Alternatively, instead of rolling, you can tear off a chunk of dough and use your fingers to press it into the tart pans. Either method works fine, so it's all up to personal preference.)
- Place the tart shells in the freezer for at least 15 minutes, while the oven preheats.
- Preheat the oven to 400 degrees F.. Using the tines of a fork, prick holes in the bottoms of the tart shells, then place on a baking sheet and bake for 7-10 minutes. Reduce the heat to 350 degrees F., and bake for another 5-7 minutes, or until lightly golden. Remove from the oven and let cool while you prepare the apples.
- Cut the apples in half lengthwise, and remove the core. Slice the apples using the thinnest setting of a mandolin, and place in a bowl.
- In a small pot on the stove, or a bowl in the microwave, heat the sugar, lemon juice, and cinnamon until the sugar has dissolved. Pour the hot mixture over the apples -- this will keep them from turning brown, and the heat will help soften them and make them easier to bend. If the apple slices are still too stiff to blend, they can be heated in the microwave for a few seconds to soften them further.
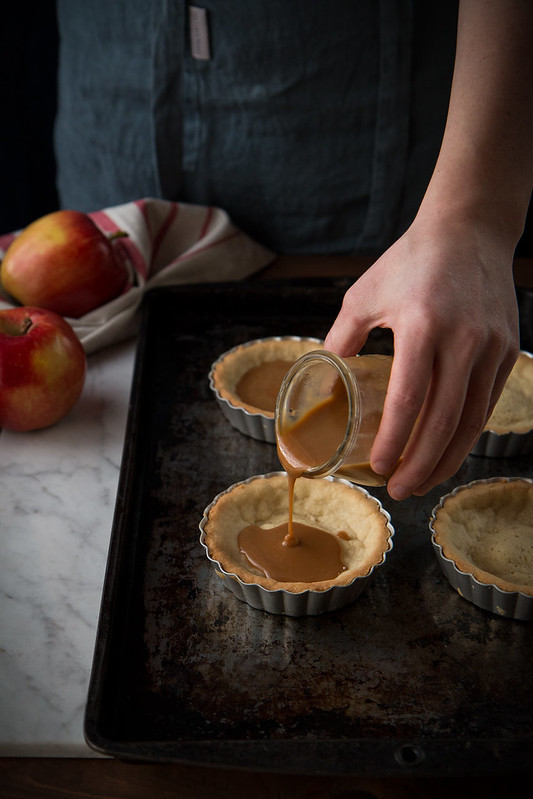
- Pour 1-2 TBSP cajeta into the bottom of each tart shell, then begin rolling the apple slices. Start by rolling one of the thinnest slices of apple into a cylinder, then roll another slice around that, and another around that. Continue adding more and more slices until you have a large rose bud. Place the bud in the center of one of the tart shells, then continue to add more slices of apple until you've reached the edges. Use your fingers to gently fan the petals out and open the rose. Repeat with the remaining tart shells.
- Return the tarts to the 350 degree F. oven, and bake for another 20-25 minutes, or until the edges of the apples have started to darken slightly.
- Remove from the oven and let cool for five - ten minutes before removing from the tart pans. Drizzle with the remaining cajeta, and serve as is, or with a scoop of ice cream or dollop of whipped cream. Enjoy!
You can find my recipe for cajeta (goats milk caramel) here: https://www.willcookforfriends.com/2015/02/homemade-cajeta-goats-milk-caramel.html


Oh my goodness these are breathtaking, Willow!!! That cajeta sounds incredible and these roses — just no words. So beautiful!
These caramel and apple tartlets are just beautiful! I love the little rose inspired design especially.
This is a labor of love, and the pictures are amazing.
These are outstanding! Lovely photographs as well!
Thank you!
These are the most exquisitie “apple pies” I have ever seen. So creative and so beautiful. And the cajeta. . .have I died and gone to heaven?
Aw, thank you so much, Lynn! That’s exactly what I thought when I first discovered cajeta — so good!
Art on a plate! well done.
willow: those are STUNNING. seriously i’d take these over roses (or any flowers, FLOWERS SHMOWERS) any. day. of the week.
I’m out of words with these things: i can’t manage the words to say how gorgeous these look, but they’re just incredible and i am SO JEALOUS because i wish i had thought of these. ugh they’re amazing.
ps: please come live at my house?
Haha! First of all, YES, I’ll move in Thursday. Secondly, I’m thrilled you think they’re so pretty! I actually surprised myself a little, because I went into it thinking they would be really difficult to make. Turns out? Totally wrong. :)
This is just beautiful. From photography to the recipe.. So well done.
Thank you so much! :)
Oh my goodness I just found your blog and I am SO glad I did! It is absolutely beautiful! I one day hope my food photography is as good as yours!
Lauren xx
Aw, tank you so much, Lauren! I’m really flattered. I clicked over to check out your blog (which is FABULOUS) and your photography is pretty much a bajillion-million times better than mine was when I was starting out, so you’ve got nothing to worry about. ;)
Aww that’s so sweet Willow thanks :D Thanks for checking it out! :)
These look amazing! I’m planning on making this for Thanksgiving but wanted to ask, what is the consistency of the caramel after baking? I’m hoping it is thick, as I want to make this as one large tart and I’m worried about how it will slice/serve.
Thanks!
The caramel sauce itself is fairly thick, but when it’s hot from the oven and mixed with any juices from the apples, it is a little bit thinner. I don’t think it would be a problem in a larger tart, but since I’ve only made the mini ones, I can’t say for certain. Sorry I can’t be more help on this one!
can you freeze the tarts prior to baking?
Hi Kay! I haven’t tried it myself, but I don’t see why not! Just be sure to adjust the baking time if they’re frozen. :)
Hi, can you baked them and freeze them after being cooled off then take them out at room temp to defrost and warm in oven after? Pls let me know your thoughts. Thanks!