
Today may well have been the perfect fall day. The colors were bright, the sun was shining, the breeze was blowing, and for all I know children were laughing. It may well have been, perfect. But I wouldn’t know, because I’ve been inside making friends with the bathroom floor (if you’re reading this, bathroom, I’m sorry I haven’t gotten around to cleaning you in awhile…), and losing my marbles (if you couldn’t tell).
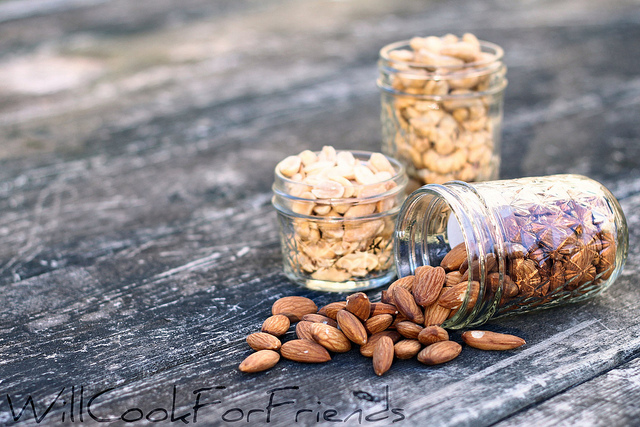
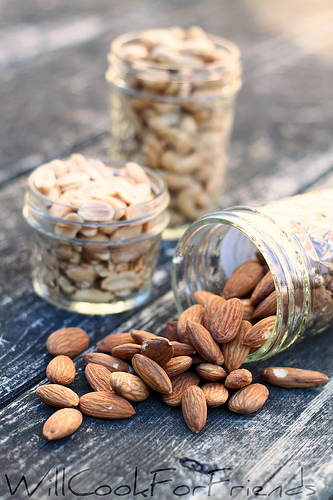
Yesterday I had high hopes of feeling better, and even went so far as to go disc golfing and rollerblading before realizing that no, I’m still not well. However, since my whining doesn’t make for very good food blogging (oh, how I wish it did…), I went ahead and managed to snap a few shots on the subject of nut butters.

(Squirrel done gone run away with my nut!)
I love nut butters – peanut butter, as you know, is both the love of my life and my mortal enemy. But that’s only one of the many wonderful options when it comes to grinding your own. Cashew butter is another favorite, not to mention hazelnut (did someone say Nutella?), and of course, almond butter. The different varieties of nuts are only the beginning of all the possibilities, too – spice roasted, honey or maple coated, or a dash of cocoa added – it’s all good!
First, let’s talk about the roasting. If you’re making peanut or cashew butter, you may already have roasted and salted nuts, in which case you can just add them to your food processor and blend until smooth. If your nuts are raw, however, you’ll need to roast them yourself, which leaves lots of options open in terms of flavoring.
Whatever nut you’re using (or seed), spread them on a baking sheet and bake in a 350f. oven for (usually) 15-20 minutes, or until the nuts are fragrant and golden brown. During the cooking, you should check on them frequently and stir them, or give the pan a shake, to make sure they aren’t burning. If they start to turn black, or smell smoky, you’ve gone too far, or your oven is running hot. You can always roast at a lower temperature and go longer, which I actually prefer when I’ve got the time. They should smell warm and, well, nutty.
Remove the roasted nuts from the oven, and in the case of hazelnuts, put the still hot nuts in a clean dish towel and rub them against each other inside the bundle – this friction will remove their skins, which are tough not slightly bitter. In the case of pistachios and peanuts, the shells can be removed before or after roasting – up to you. Roasting them in the shell will generally take an additional five minutes in the oven. Be sure to let them cool before trying to remove any shells.

Now, prior to roasting, the nuts can optionally be tossed with oil and salt, other seasonings, or honey or maple syrup, depending on what you’re going for. Even if you want a classic savory butter with just nuts and salt, though, it isn’t necessary to salt before roasting – you can always add a dash during the blending.
Now that we’ve gone over the basics, you’re pretty much set to go out and experiment making your own. You’re well on your way to being able to make it in this world *sniff* – you don’t need me anymore!
But, I won’t let you leave that easily. I still have some wisdom to share. As promised in the title of this post, here is a quick and easy recipe for one of my personal favorites.
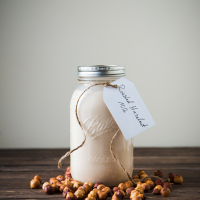
Honey Roasted Almond Butter
2 cups raw almonds
4 TBSP honey
1 tsp. cinnamon (this, and other spices, optional)
1/2 tsp. sea salt
1 TBSP oil (I use coconut, but almond, or olive or other vegetable oil would work fine as well)
Method
Preheat oven to 350f., and line a baking sheet with parchment paper.
Toss all ingredients together in a bowl until the nuts or evenly coated, then spread on the sheet and bake for 10-15 minutes. Give them a stir or a shake every 3-5 minutes to be sure they roast evenly – you don’t want them to char!
Once they smell roasty-toasty and good, pull them from the oven and move them around a bit with a spatula before letting them cool a bit. As they come to room temp, they’ll stick to one another and get very hard, hence the moving them around first.
Now that they aren’t quite piping hot, add them to your food processor and pulse a few times to get it going, then let it spin for 5-10 minutes. Yeah, you heard me right. You might want to leave the room at this point, ’cause I’m not going to lie… it’s loud.
If all goes well, the nuts will release their luscious fats and your butter will become smooth and dreamy all on its own. If, after a good long time in the processor, you haven’t reached the desired consistency, drizzle in a little more oil (very, very slowly – you don’t want to add too much) just until it comes together.
Stop the processor and taste, adding more salt, honey, cinnamon, etc. as you like it. Blend to combine, then jar and store in the refrigerator.

I’m no expert on how long these things will last without any kind of commercial grade sealing, but I’ve let mine go for several months without any problems. That won’t be an issue though, I assure you – this stuff usually disappears within a week or two of making, in my experience. That ‘several month’ experiment was an accident caused by forgetfulness and having too much stuff in my fridge. When I did discover that jar again, neglected and pushed to the back behind the other jams and jellies, it was like stumbling upon hidden treasure. Like that twenty bucks you left in your coat pocket last year and are only discovering now, as the weather turns cold again. Only tastier.
Cheers!


Hey, it’s Anna, I LOVE this site and want to cook pretty much everything on it! I’m excited to try the beer pancakes with the Guinness! Email me if you get a chance, I’m trying to make something for Kennan for his birthday and I need your advice.
<3 Anna
[email protected]
Anna!!! Thank you, thank you! I’ll e-mail as soon as I get the chance. :D
Oh how fun! This is a great DIY and one that I’m definitely going to have to test out. Thanks for all of the information about roasting and seasoning. Great stuff!
No problem, hope you have fun with it. :)